How to Trim your Insoles - 4 Easy Steps:
Step 1: Remove the Existing Insoles
If your shoes already have insoles, take them out before attempting to trim new ones. This will give you a more accurate idea of the space available inside the shoe.
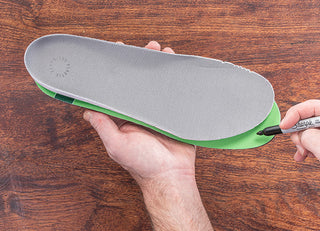
Step 2: Create an outline for your insole using the liner
Using a marker or pen, trace the outline of your shoe onto the insoles. This will give you a clear guide on where to trim. If you have a shoe size template, you can use it to mark the correct size on the insoles.

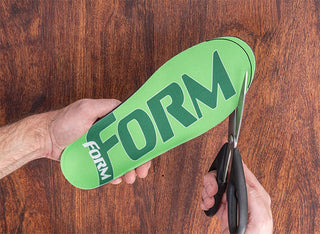
Step 3: Mark the Excess Material & Cut
Using a marker or pen, trace the outline of your shoe onto the insoles. This will give you a clear guide on where to trim. If you have a shoe size template, you can use it to mark the correct size on the insoles.

Step 4: Place the trimmed insole into your shoe
Place the trimmed insoles back into your shoes and check the fit. Make sure they cover the entire bottom of the shoe and don't cause any discomfort.


